Zip Pouch Pattern Generator

Pattern Generator

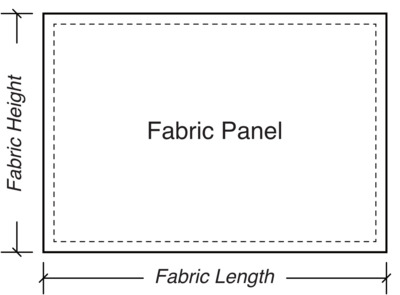
zip pouch planThis pattern generator details the 2D fabric panel sized needed to achieve desired 3D dimensions of a rectangular zip pouch. Referencing the image, provide the desired dimensions for finished size pouch.

zip pouch pattern
  • Seam Allowances: 3/8" (1 cm) typical with 1/2" (1.3 cm) Zipper Allowance

  • Fabric Width:
  • Fabric Height:

Material List

Getting Started

  • One zipper atleast Fabric Height . For more information on zippers, see Zippers Guide.
  • One fabric panel to match the pattern dimensions.

There are tons of fabric options. Learn more about technical fabrics, recommendations, and trusted vendors in our new Fabrics Guide. Here are a few recommendations.

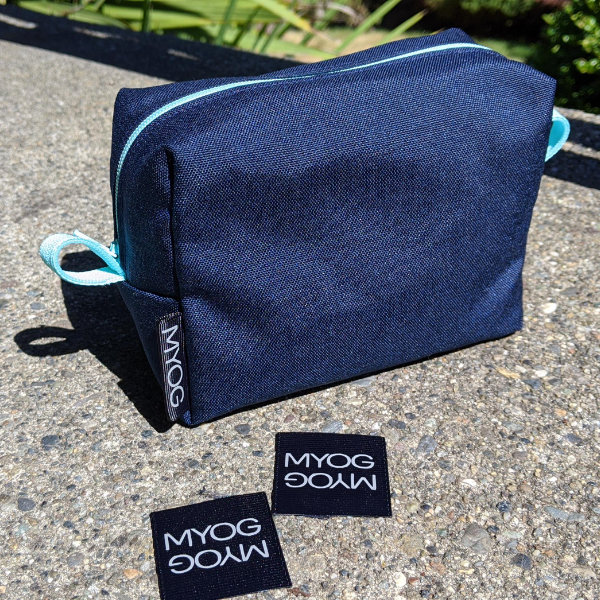
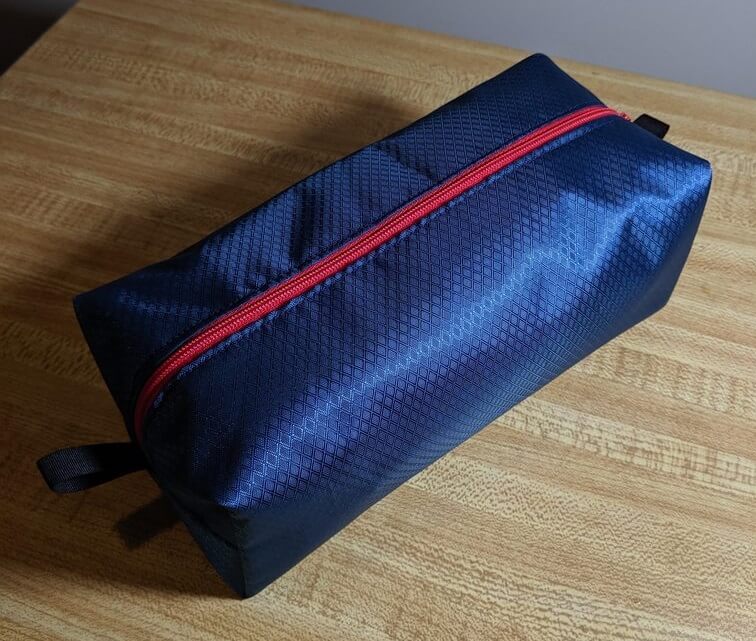
Completed zip sack example
  • Cordura 500d or 210d Robic Nylon are great choices for durable, self standing zip pouch.
  • HyperD 300 is water tight and comes in many bright colors. Example is Moroccan Blue.
  • 1.9oz PU Coated Nylon for lightweight, water resistant pouches with many color options.
  • Patterned cotton have unlimited creative options and can be found at local quilt shops.

Assembly Instructions

Measure and Cut Fabric

Pattern
  1. Using the generated Fabric Width and Fabric Height , measure and draw the dimensions on a fabric panel.
  2. Cut the fabric panel along the outer perimeter.
  3. Mark the 1/2 inch (1.3 cm) zipper allowance along the Fabric Height edges.
  4. Mark the 3/8 inch (1 cm) seam allowance along the Fabric Width edges.

Attach Zipper

Pattern
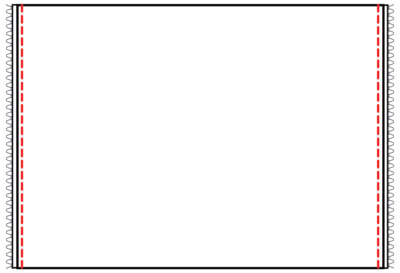
  1. With the fabric panel wrong side facing up, align one edge of zipper tape to Fabric Height edge and sew within the 1/2 inch zipper allowance.
  2. Align the opposite zipper tape along the other Fabric Height edge and sew.
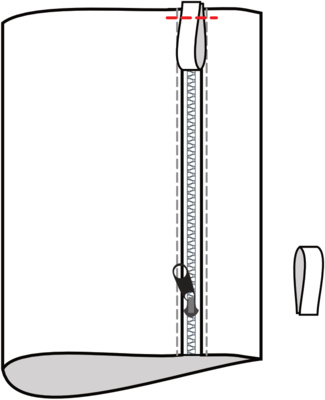
  3. Line up the Fabric Width edges and add the zipper pull.
  4. If using a closed end zipper, ensure Fabric Width edges align when sewing the opposite zipper tape.

With the zipper closed, you should have a cylinder with fabric's wrong side out!

Close Zip Pouch Ends

Pattern
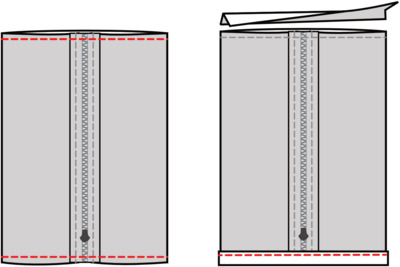
  1. With wrong sides out, close zipper and lay flat. Ensure zipper is parallel with edges. Zipper should be evenly spaced in the middle.
  2. Lining up the bottom edge, sew one end closed with the 3/8 inch (1 cm) seam allowance. Being careful not to break your needle, sew over the zipper.
  3. Flip around, smooth out and ensure zipper is still parallel and evenly spaced. Sew opposite end with 3/8" (1 cm) seam allseam allseam allowance.
  4. If you have long zipper tape, don't make the rookie move and sew your zipper pull on the outside of the bag!
  5. Trim excess zipper tape off both ends.
  6. For bonus points, consider adding pull loops to the zipper ends. Grosgrain ribbon or excess zipper tape work great. Make sure your loops are sewn INSIDE the pouch!

You should now have a flat zip pouch that you can open and close with the zipper. In the next step, we'll give it some volume.

Square Up the Ends

Pattern
  1. With wrong sides out, fold the sack so the zipper is pressed in half along the long edge. From an end, this creates the shape shown ->
  2. Take care to smooth out the corners so the ends are square and symmetric.
  3. Measure your desired width and height as shown. Again keep everything square and symmetric.
  4. Stitch two seams as shown along the dashed lines (5) and (6). Make sure your seams are perpendicular to the seam from the previous step.
  5. Repeat on the opposite end.
  6. Before trimming your corners, flip your sack right side out and ensure your zipper runs evenly down the middle of pouch.

If everything went to plan, you can now trim your corners. To prevent fraying, take the time to bind your seams with bias tape or grosgrain ribbon.

Congrats! You now have a functional zip pouch, hand made to your exact dimensions!